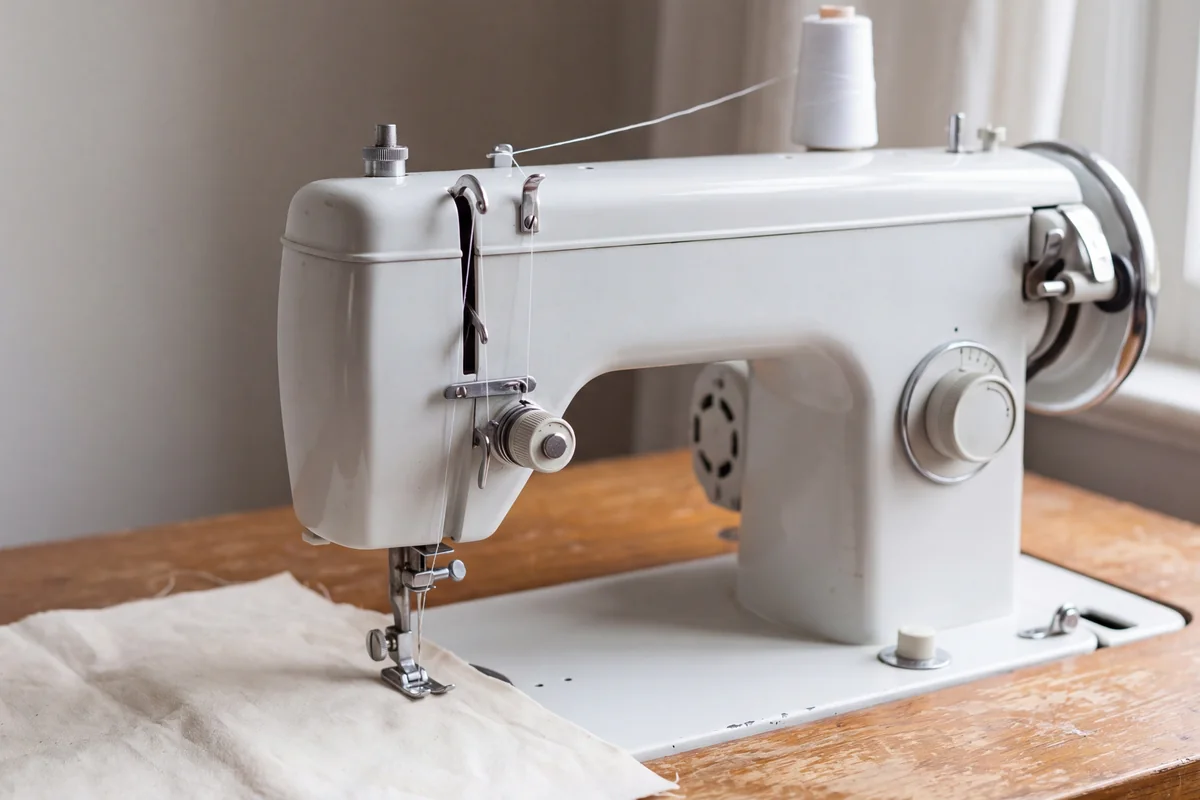
The parts of a sewing machine you will touch every session are the spool pin, thread guides and take-up lever, tension dial, needle and needle clamp, presser foot and presser foot lever, feed dogs, bobbin and bobbin case, handwheel, stitch selector and stitch length control, reverse lever and foot pedal. Layouts differ from machine to machine, so the labeled diagram in your own manual is the final word on where each part sits and how it works on yours.
Below, the parts of a sewing machine and their functions are grouped by job, each with one beginner tip or common mistake. For where this fits in your first weeks, start with How Do I Start Sewing as a Complete Beginner?. If you are still choosing a machine and kit, see sewing machines and tools for beginners.
The thread path on top
The top thread travels from the spool, through guides and tension discs, up to the take-up lever and down to the needle. This section covers what each stop does; your manual’s threading diagram shows the exact order for your model.
Spool pin
The spool pin holds your reel of thread. On most machines it stands upright or lies flat with a spool cap on the end. Tip: use the spool cap that best fits the end of your reel so the thread unwinds without catching.
Thread guides
Thread guides are the small hooks, slots and loops that lead the thread toward the needle, often with printed numbers or arrows showing the order. Tip: missing one guide is a common cause of skipped stitches or loops, so rethreading the top is usually the first fix when stitching suddenly looks wrong.
Tension discs and tension dial
The tension discs are two small plates that squeeze the top thread to control how tightly it feeds. The tension dial sets how firmly they press, and higher numbers usually mean tighter.
Tip: thread with the presser foot raised. On most machines, raising the foot opens the tension discs so the thread can slip between them. Many dials mark a recommended default, often around the middle, so check your manual and leave it there until a test seam says otherwise.
Take-up lever
The take-up lever is the arm that moves up and down above the needle, pulling up slack thread to tighten each stitch. Tip: start and stop with it at its highest point. If you start sewing with it low, the needle often comes unthreaded on the first stitch.
Needle eye
The eye of the needle is the last stop. On most modern home machines you thread it from front to back. Tip: trim a frayed thread end before threading.
The needle area
Needle
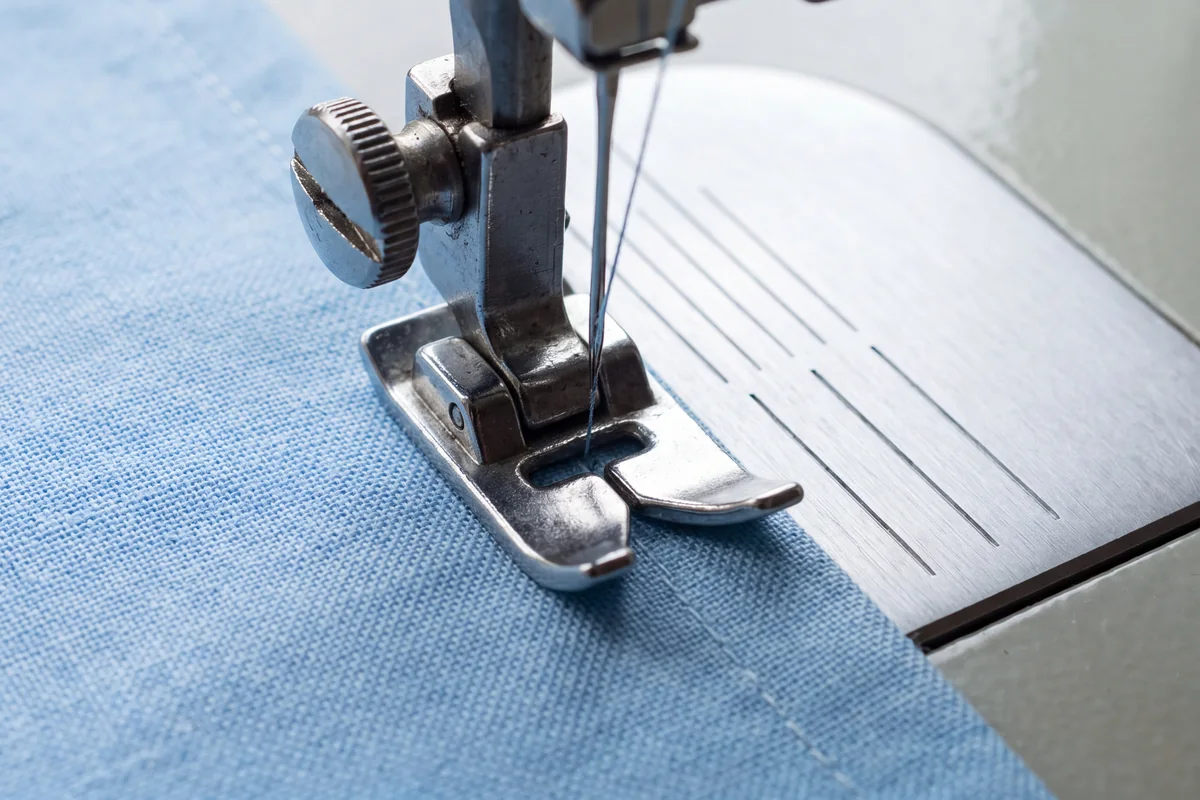
The needle carries the top thread through the fabric. Sizes are often written as two numbers, such as 80/12, and a universal 80/12 is a common choice for medium-weight cotton. Matching needle to fabric is part of How to Choose Fabric for Your First Projects.
Tip: on most home machines the flat side of the needle’s shank (the thick top part) faces the back. Needle maker SCHMETZ suggests a new needle after about 8 hours of sewing, and sooner if it is bent, dull or skipping stitches.
Needle clamp screw
The needle clamp screw holds the needle in place. You loosen it, push the new needle up as far as it goes, then tighten it. Tip: a needle that is not pushed all the way up can skip stitches or strike the needle plate.
Presser foot
The presser foot is the small metal or clear plastic foot that holds the fabric flat against the feed dogs while you sew. Many machines use snap-on feet that click on and off. Tip: check the foot has clicked firmly in place before you sew.
Presser foot lever
The presser foot lever raises and lowers the foot, usually from behind or beside the needle area. Tip: lower the foot before you sew. Sewing with it up leaves the top thread with almost no tension, one of the most common reasons thread bunches into a tangle under the fabric.
Needle plate and seam guide lines
The needle plate (also called the throat plate) is the flat metal plate under the needle, with openings for the needle and feed dogs. On most machines, engraved lines to the right of the needle mark distances from it, often in inches and millimeters, and many include a line at 5/8 in (1.5 cm).
These lines help you sew an even seam allowance, the distance between your stitching and the fabric edge. Tip: watch the fabric edge against the line, not the needle.
Underneath the needle plate
Feed dogs
Feed dogs are the small ridged metal teeth that poke up through the needle plate and move the fabric away from you, toward the back of the machine, one stitch at a time. Tip: guide the fabric, but do not push or pull it, which can bend the needle. If fabric will not move, check the feed dogs are raised.
Bobbin
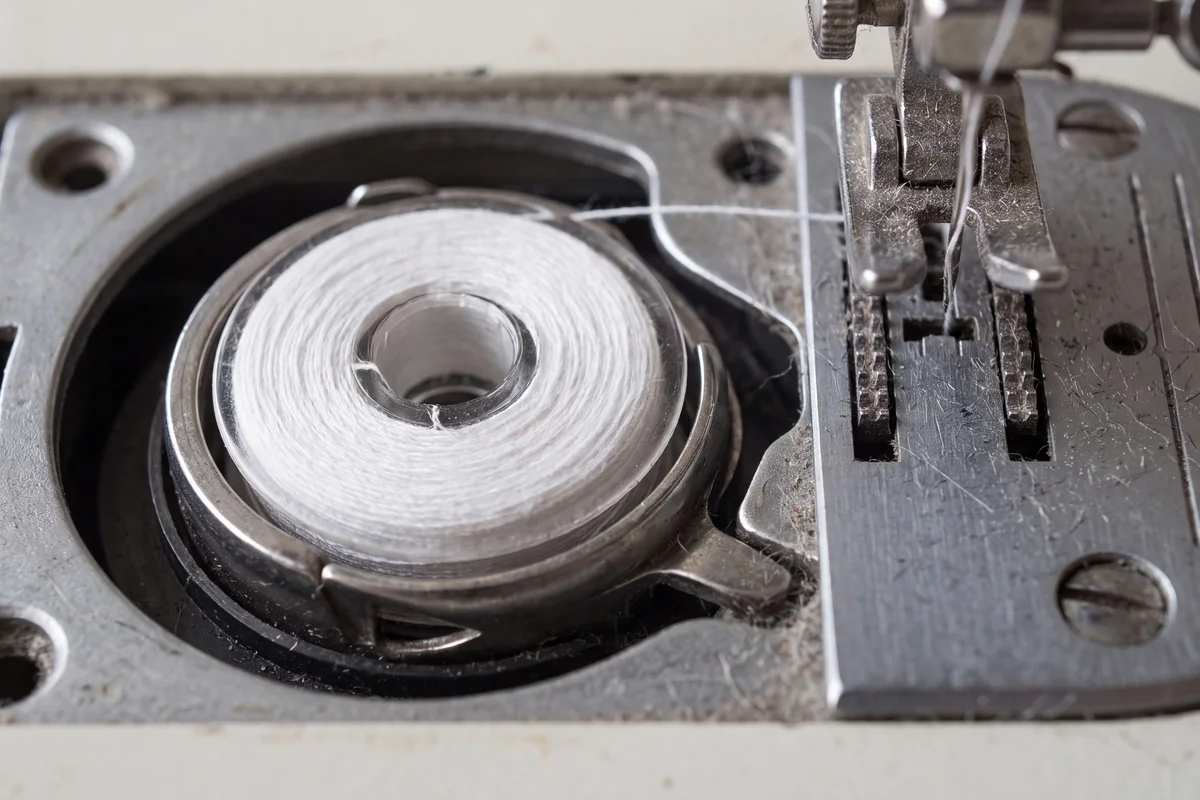
The bobbin is the small spool that holds the lower thread. The top and bobbin threads lock together inside the fabric to form each stitch. Tip: use bobbins made for your machine, because similar-looking bobbins can differ slightly in height or shape and cause jams.
Bobbin case or drop-in bobbin
A drop-in bobbin (also called top-loading) sits in a holder under a clear cover in the needle plate, so you can see how much thread is left. A front-loading bobbin goes into a removable metal bobbin case that clips into the machine behind a small door below the needle area.
Bobbin tension is how firmly the bobbin case grips the lower thread, set by a tiny screw on the case. Tip: leave that screw alone; most tension trouble starts in the top thread path.
Bobbin winder and its stop
The bobbin winder is a small spindle, usually on top toward the right, that winds thread onto an empty bobbin. On many machines you push the bobbin toward a stop, which clicks back to end winding when the bobbin is full. Tip: push the spindle back when you finish, because on many machines the needle will not move while it is engaged.
The controls
Power switch
The power switch is usually on the right side near the cord. Tip: switch off whenever you step away, and unplug before you work near the needle.
Handwheel
The handwheel is the large wheel on the right that moves the needle and take-up lever by hand. On most home machines you turn it toward you, so the top of the wheel moves in your direction. Tip: turning it the wrong way can tangle thread in the bobbin area on many machines.
Stitch selector
The stitch selector is the dial, buttons or screen for choosing a stitch. Straight stitch is usually the default and the one you will use most in your first year.
Stitch length and width
Stitch length, in millimeters on most machines, is how far the fabric moves for each stitch. About 2.5 mm is common for straight seams in woven cotton, and around 4 to 5 mm is used for basting (long, temporary stitches that are easy to remove).
Stitch width is how far the needle swings side to side for zigzag. For a straight stitch it is usually set to 0. Tip: if your straight stitch suddenly zigzags, check the width.
Reverse lever or button
The reverse lever or button makes the machine sew backward. You use it to backstitch, sewing a few stitches back and forth at the start and end of a seam so it cannot unravel, one of the skills in Basic Sewing Techniques Every Beginner Should Know. Tip: on most machines it only reverses while held down.
Foot pedal
The foot pedal controls speed, much like a car’s accelerator. Tip: start slowly. Some machines also have a speed slider that caps the top speed while you practice.
The body
Free arm
The free arm is the narrow section that appears when you slide off the extension table or accessory box. It lets you sew around sleeves, cuffs and pant legs (trouser legs in the UK).
Light
A small light above the needle area shines on your stitching, and many newer machines use an LED.
Accessory box
The accessory box, often built into the extension table, usually holds extra feet, bobbins, needles, a seam ripper, a small screwdriver and a lint brush. Tip: keep the manual with it, and brush lint from the bobbin area and feed dogs with the machine unplugged.
How do the parts work together to make a stitch?
The needle carries the top thread down through the fabric, a hook below the needle plate loops it around the bobbin thread, then the take-up lever pulls the stitch tight and the feed dogs move the fabric along.
Here is a quick test seam on scrap cotton:
- With the presser foot raised, check the top thread follows every guide and the bobbin is in place.
- Set straight stitch, length about 2.5 mm, width 0.
- Line the fabric edge up with a guide line and lower the presser foot.
- Turn the handwheel toward you to lower the needle into the fabric.
- Hold both thread tails lightly behind the foot, press the pedal gently, sew a few stitches, reverse a few, then sew forward to the end.
- Turn the handwheel to raise the needle and take-up lever, lift the foot and slide the fabric out.
If the stitches look even on both sides, a first small project from Easy Sewing Projects for Beginners is a natural next step.
Safety habits around the moving parts
Unplug the machine before you change the needle or presser foot, or clear a jam, because a light touch on the pedal is enough to move the needle. While you sew, keep your fingers to the sides of the presser foot and never directly in front of the needle.
FAQ
Which way do you turn the handwheel on a sewing machine?
On most home machines you turn the handwheel toward you, so the top of the wheel moves in your direction. Turning it the wrong way can tangle thread in the bobbin area on many machines.
What do the feed dogs do?
Feed dogs are the small ridged metal teeth that poke up through the needle plate and move the fabric away from you, toward the back of the machine, one stitch at a time. Guide the fabric, but do not push or pull it.
Why should the presser foot be up when threading?
On most machines, raising the presser foot opens the tension discs so the thread can slip between them.
What is the difference between a drop-in and a front-loading bobbin?
A drop-in bobbin sits in a holder under a clear cover in the needle plate, so you can see how much thread is left. A front-loading bobbin goes into a removable metal bobbin case that clips into the machine behind a small door below the needle area.