The basic sewing techniques every beginner needs first are threading the machine, winding a bobbin, keeping an even seam allowance, sewing a straight line, backstitching, pivoting at corners, finishing seams, pressing, and a few hand stitches such as sewing on a button. Learn those nine and you can sew most first-year projects, from cushion covers to tote bags.
Each section below gives the one number or tip that matters most.
If you have not set up your machine or gathered supplies yet, start with how to start sewing as a complete beginner and come back here.
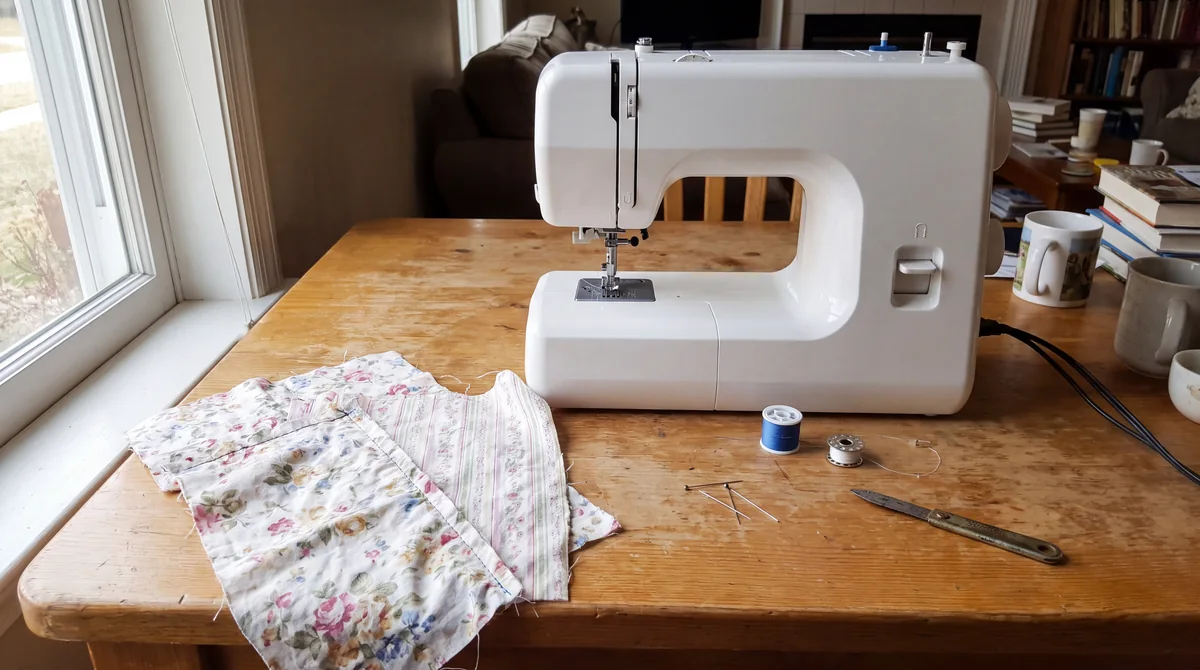
The nine core techniques at a glance
The nine skills fall into four groups: machine setup, seam basics, finishing and pressing, and hand stitches. Keep this practice kit next to your machine while you work through them:
- Prewashed quilting cotton scraps, about 10 in (25 cm) square
- A size 80/12 universal needle (the usual choice for medium-weight cotton; see the SCHMETZ needle guide)
- All-purpose polyester thread in a color that shows up on your fabric
- A seam gauge or small ruler
- Pins or sewing clips
- An iron, ironing board and a press cloth (a scrap of plain cotton works)
- A hand-sewing needle and a few spare shirt buttons
Set your machine to a straight stitch with a length of 2.5 mm. That is a solid default for almost every seam in this series.
Machine setup: threading and winding a bobbin
These two come first, because nothing else works until the machine is set up correctly.
Threading the machine
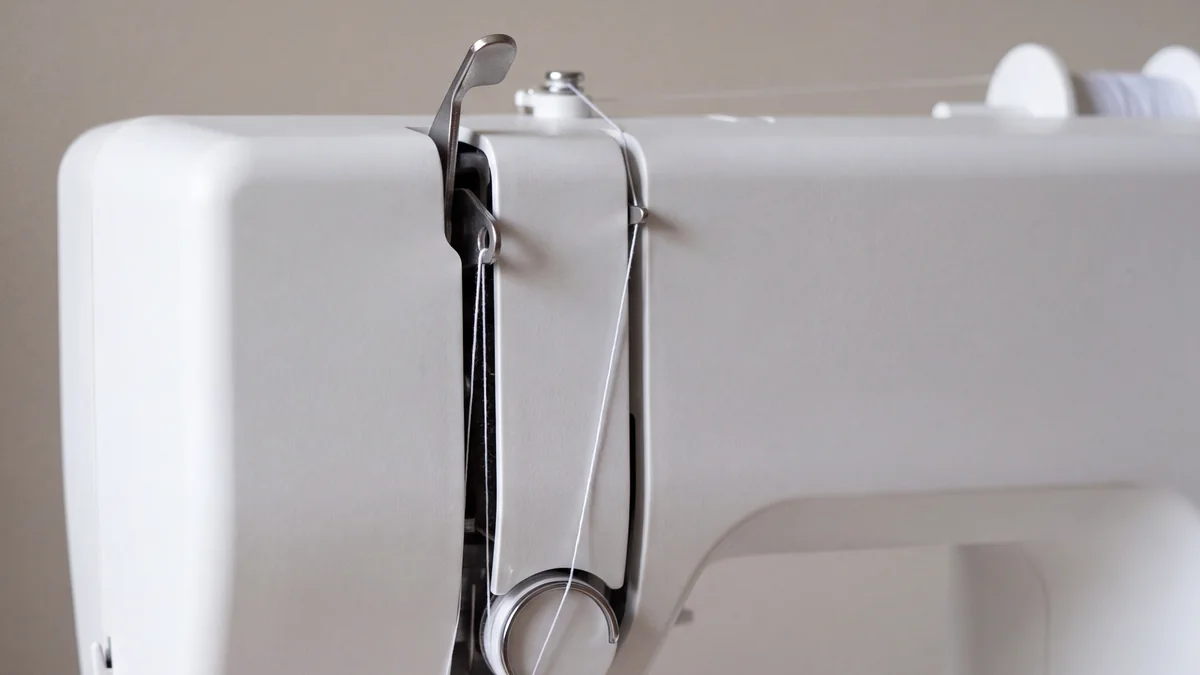
Almost every home machine follows the same path: spool pin, thread guide, tension discs, take-up lever, then the needle. Your manual’s diagram is the final word for your model.
Two habits prevent most threading trouble:
- Raise the presser foot (the hinged foot that holds fabric flat while you sew) before threading. This opens the tension discs so the thread can seat between them.
- Turn the handwheel toward you until the take-up lever (the metal arm that moves up and down) is at its highest point.
If you see a tangled nest of loops under your fabric, rethread the top thread with the presser foot up before you touch any tension dial. A missed tension disc is the usual cause.
Winding a bobbin
A bobbin is the small spool that holds the lower thread. Fill it with the same thread you use on top, so both sides of the stitch behave the same way.
Use only the bobbin type listed in your manual. Bobbins that look identical can differ slightly in shape, and the wrong one can cause skipped stitches or jams.
Wind at a steady medium speed so the thread lies in smooth, even layers. A lumpy or spongy bobbin gives uneven stitches, so unwind it and start again.
Seam basics: the four skills behind every project
Every seam you sew combines these four skills, so practice them on scraps until they feel routine.
Seam allowance
Seam allowance is the distance between the cut edge of the fabric and your line of stitching. On Big 4 patterns (Simplicity, McCall’s, Butterick and Vogue) the standard is 5/8 in (1.5 cm).
Other projects use different widths. Quilting uses 1/4 in (6 mm), and many independent patterns use 3/8 in (1 cm) or 1/2 in (1.3 cm), so always check the pattern before you cut.
To keep it even, line the fabric edge up with the matching engraved line on the needle plate (also called the throat plate, the metal plate under the presser foot). If the lines are hard to see, stick a strip of masking tape at the right measurement.
Sewing a straight line
Watch the fabric edge against your seam guide, not the needle. Your eyes follow the guide, and the line follows your eyes.
Let the feed dogs (the small toothed bars under the presser foot) move the fabric while your hands only steer. Pushing or pulling the fabric makes wavy lines and can bend the needle.
For a warm-up, stitch along notebook paper lines with an unthreaded old needle, then swap in a fresh needle for fabric, since paper dulls needles.
Backstitching
Backstitching means sewing a few stitches in reverse at the start and end of a seam to lock the threads so the seam does not unravel. Sew forward 3 or 4 stitches, hold the reverse lever or button to sew back over them, then release and carry on.
Repeat at the end of the seam. About 3/8 in (1 cm) of reverse stitching, 3 or 4 stitches at 2.5 mm, is plenty.
Skip backstitching on basting stitches (long temporary stitches) that you plan to pull out later.
Pivoting at a corner
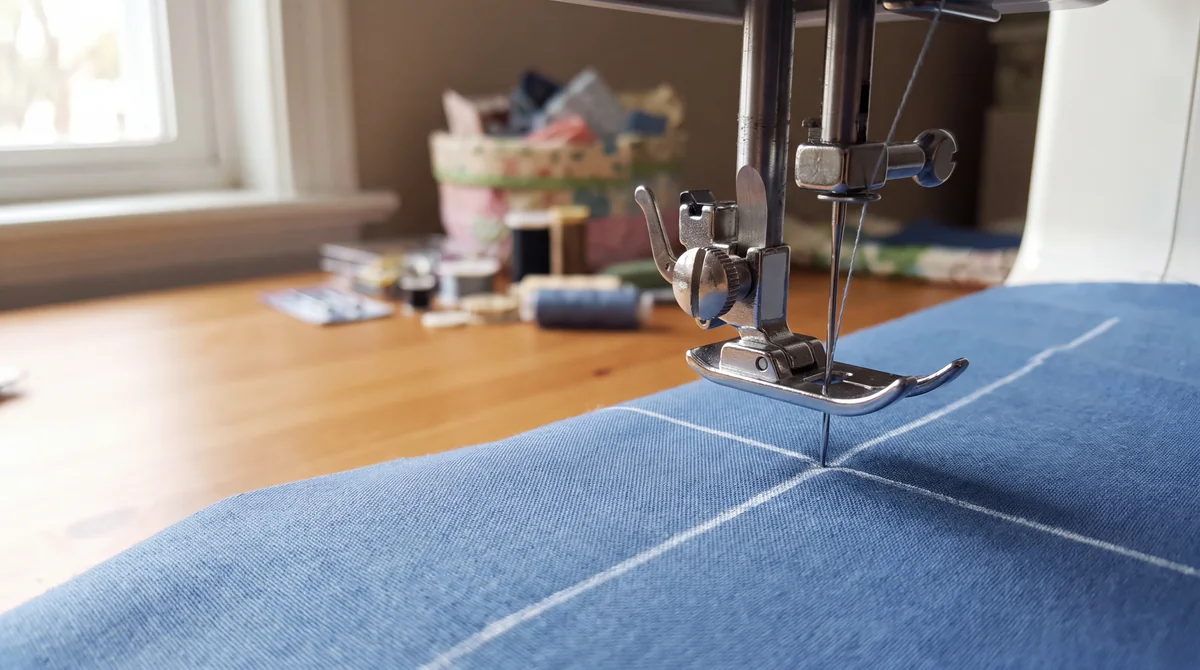
To turn a sharp corner, stop with the needle down in the fabric, lift the presser foot, rotate the fabric around the needle, lower the foot and keep sewing. The needle acts as an anchor, so the corner stays exactly where you stopped.
The key number is where to stop: one seam allowance away from the next edge. For a 5/8 in (1.5 cm) seam, stop 5/8 in (1.5 cm) before the end. Mark that point with chalk or a pin before you reach it.
Finishing and pressing
These two skills take a few extra minutes per seam and make a project look finished.
Finishing seams without a serger
Woven fabric frays at the cut edges, especially in the wash, so each seam allowance needs a finish. You do not need a serger (called an overlocker in the UK) to do it.
The simplest option is a zigzag stitch along the raw edge of the seam allowance. A medium zigzag, around 4 mm wide and 2 mm long, is a good starting point, but test it on a scrap first.
Pinking shears and French seams (good for lightweight fabrics) are other options.
Pressing vs ironing
Pressing means lifting the iron and setting it down on one spot, while ironing means sliding it back and forth. Sliding can stretch seams out of shape, so sewists press.
Press every seam before you cross it with another one. First press the seam flat as sewn to set the stitches, then press it open or to one side as your pattern says.
Match the heat to the fiber:
- Cotton and linen: high heat with steam
- Wool: medium heat with steam and a press cloth
- Silk, polyester and nylon: low heat, using a press cloth if you are unsure
When in doubt, test on a scrap and check the fabric care label.
Hand stitches: sewing on a button and a few basics
Sewing on a button is the most useful hand stitch in your first month, for projects and for mending.
Sewing on a button by hand
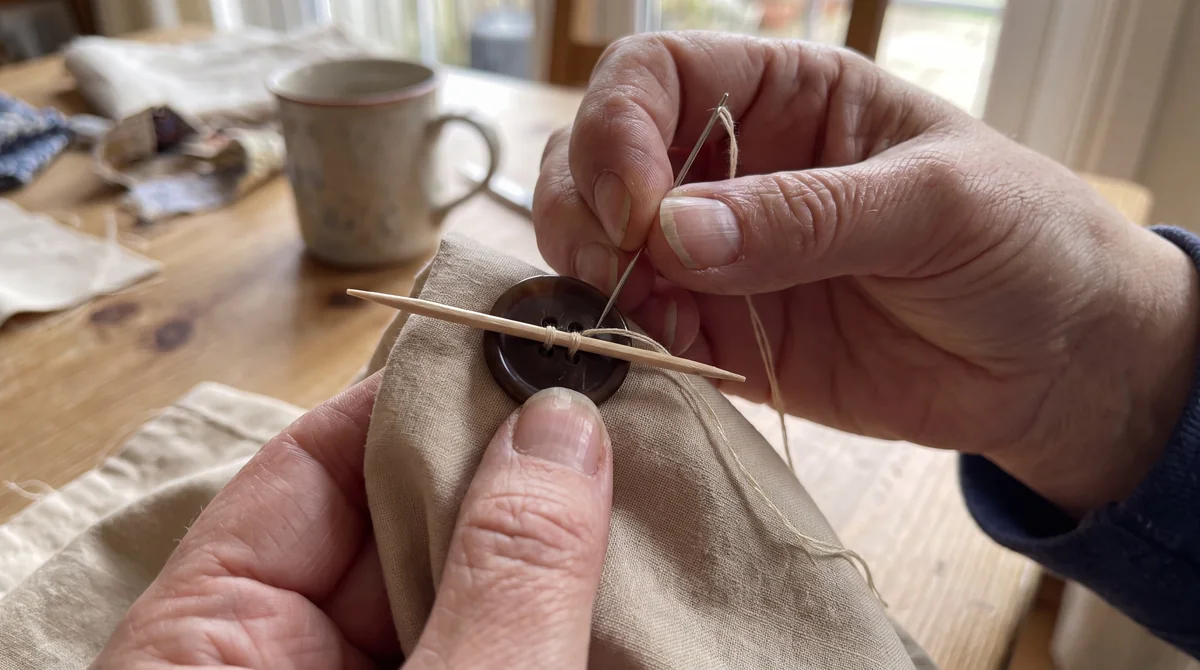
Use a doubled strand of thread with a knot at the end, and start from the back of the fabric so the knot is hidden. Make 4 to 6 passes through each pair of holes.
For coats and thicker fabric, lay a pin or toothpick across the top of the button while you stitch. Remove it, then wrap the thread a few times around the stitches under the button to form a shank (a short thread stem that leaves room for the buttonhole layer).
Finish with a few tiny stitches on the back and a knot.
Later, add running stitch (a simple in-and-out stitch for basting) and ladder stitch (for closing openings almost invisibly).
What order should you practice these techniques in?
Practice in the order a real project happens: set up the machine, control the seam, lock and turn it, then finish and press. Hand stitches can slot in anywhere.
Here is a simple plan of six short sessions:
- Session 1 (about 30 minutes): Thread the machine and wind a bobbin, three times each, until you can do both without opening the manual.
- Session 2 (about 45 minutes): Sew straight lines on notebook paper, then on two layers of cotton at a 2.5 mm stitch length.
- Session 3 (about 30 minutes): Sew five seams at 5/8 in (1.5 cm) and measure each one with a seam gauge.
- Session 4 (about 45 minutes): Draw a 6 in (15 cm) square on a scrap and stitch around it, backstitching at the start and end and pivoting at each corner.
- Session 5 (about 30 minutes): Zigzag the raw edges of your practice seams, then press them flat and open.
- Session 6 (about 30 minutes): Sew three buttons onto a scrap, one of them with a thread shank.
A simple first project that uses every skill
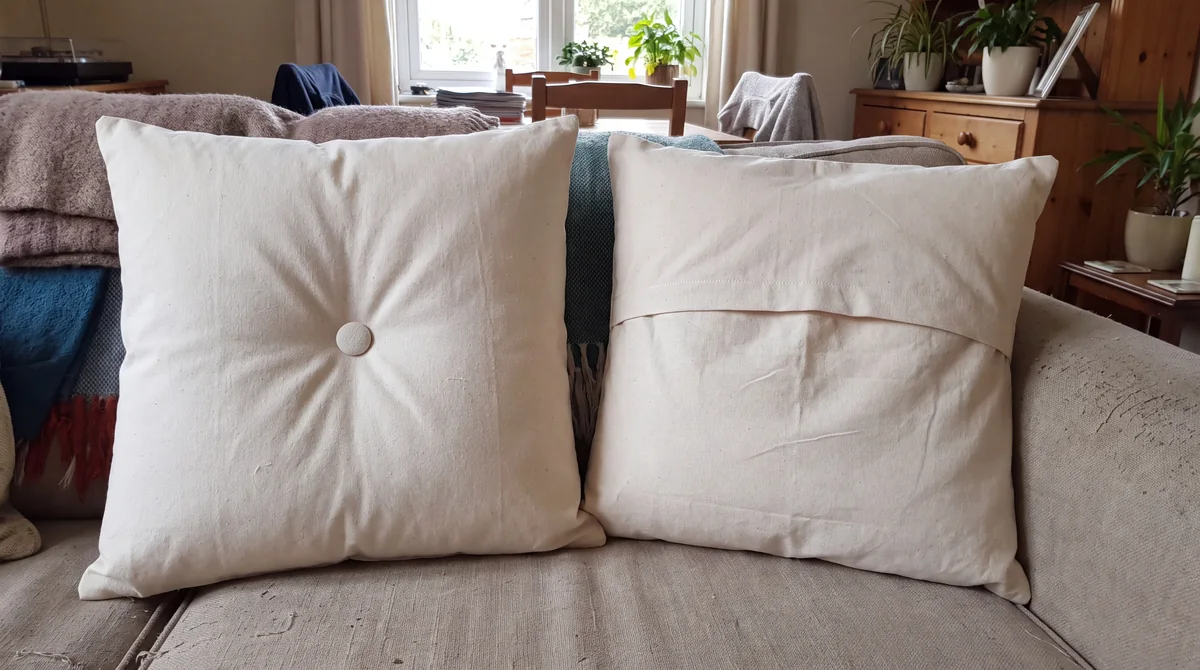
An envelope-back cushion cover with a decorative button uses all nine techniques in one small, satisfying project. It has no zipper, no curves and only straight seams.
What you need:
- About 1 yd (0.9 m) of 44 in (112 cm) wide quilting cotton, which leaves room for prewashing, straightening the edges and an easy cutting layout
- A 16 in (40 cm) square cushion insert
- All-purpose thread to match
- One button, about 3/4 to 1 in (2 to 2.5 cm) across
- A size 80/12 universal needle and a 2.5 mm straight stitch
Cut: one front piece 17 x 17 in (43 x 43 cm) and two back pieces 17 x 12 in (43 x 30 cm). Lay the front and one back piece side by side across the width, with the back piece’s 12 in (30 cm) side running across, and cut the second back piece below them. With 5/8 in (1.5 cm) seams, the cover finishes at about 15 3/4 in (40 cm) square, a snug fit on a 16 in or 40 cm insert, which keeps the cushion looking plump.
Here is how the skills fit together:
- Sew the button to the center of the front piece by hand.
- On one 17 in (43 cm) edge of each back piece, fold 1/2 in (1.3 cm) to the wrong side (the back of the fabric), press, fold again, press, and stitch close to the inner fold.
- Lay the front right side up (the printed side), then place both back pieces on top, right side down, with the hemmed edges overlapping in the middle and the outer edges lined up. Pin.
- Sew all four sides with a 5/8 in (1.5 cm) seam allowance, pivoting at the corners and backstitching at the start and end.
- Trim the corners diagonally without cutting the stitches, zigzag the raw edges and press.
- Turn the cover right side out through the opening, push out the corners, press again and slide in the cushion.
For your next step, try a drawstring bag or a tote using the same straight seams. Both are in these easy sewing projects for beginners.
FAQ
What is the first sewing technique a beginner should learn?
Threading the machine and winding a bobbin come first, because no other skill works without them. Right after that, practice sewing a straight line with an even seam allowance, since almost every project depends on it.
What stitch length should a beginner use?
Use a 2.5 mm straight stitch for most seams in woven cotton. Lengthen it to about 4 to 5 mm for basting stitches you plan to remove.
Do I need a serger to finish seams?
No. A zigzag stitch on a regular sewing machine, pinking shears or French seams all finish seams neatly without a serger.
How long does it take to learn basic sewing techniques?
Following the practice order above, you can work through all nine skills in about six short sessions, or two to three weekends.